Automated Installations of Multiple RHEL/CentOS 7 Distributions using PXE Server and Kickstart Files
by Matei Cezar | Published: October 30, 2014 | Last Updated: January 2, 2015
Download Your Free eBooks NOW - 10 Free Linux eBooks for Administrators | 4 Free Shell Scripting eBooks
This article is an extension of my previous PXE Boot Environment Setup on RHEL/CentOS 7 and it’s focused on how you can perform Automatic Installations of RHEL/CentOS 7, without the need for user intervention, on headless machines using a Kickstart file read from a local FTP server.
The environment preparation for this kind of installation has already been processed on the previous tutorial regarding PXE Server setup, the only key missing, a Kickstart file, will be discussed further on this tutorial.
The simplest way to create a customize Kickstart file that you can use it further for multiple installations is to manually perform an installation of RHEL/CentOS 7 and copy, after installation process finishes, the file named anaconda-ks.cfg, that resides in /root path, to an accessible network location, and specify the initrd boot parameter inst.ks=protocol://path/to/kickstart.fileto PXE Menu Configuration File.
Requirements
This tutorial, and the Kickstart file configuration, only covers the Minimal Installation of RHEL/CentOS 7 without a Graphical Installation, basically the Kikstart file resulted from the previous Minimal Installation procedure of RHEL/CentOS 7.
If you need a Kickstart file that covers GUI Installation and a specific partition table, I suggest that you first perform a customizable
Graphical Installation of RHEL/CentOS 7 in a virtualized environment and use that resulted Kickstart file for future GUI installations.
Graphical Installation of RHEL/CentOS 7 in a virtualized environment and use that resulted Kickstart file for future GUI installations.
Step 1: Create and Copy Kiskstart File to FTP Server Path
1. On the first step go to your PXE machine /root directory and copy the file named anaconda-ks.cfg toVsftpd default server path (/var/ftp/pub) – also the path for RHEL/CentOS 7 Local Mirror Installation Source configured on PXE network Boot Server – Step 6 (refer PXE Server setup article above).
# cp anaconda-ks.cfg  /var/ftp/pub/
# chmod 755 /var/ftp/pub/anaconda-ks.cfg
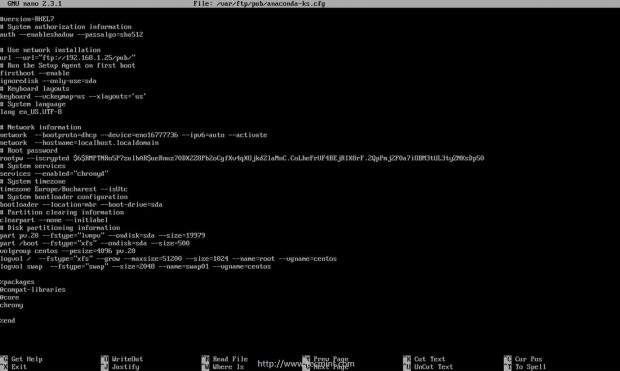
2. After the file has been copied, open it with your favorite text editor and make the following minimal changes.
# nano /var/ftp/pub/anaconda-ks.cfg
- Replace –url filed with your network installation source location: Ex: –url=ftp://192.168.1.25/pub/
- Replace network –bootproto with dhcp in case you have manually configured network interfaces on installation process.
An excerpt on how a Kickstart file might look like is presented below.
#version=RHEL7
# System authorization information
auth --enableshadow --passalgo=sha512

# Use network installation
url --url="ftp://192.168.1.25/pub/"
# Run the Setup Agent on first boot
firstboot --enable
ignoredisk --only-use=sda
# Keyboard layouts
keyboard --vckeymap=us --xlayouts='us'
# System language
lang en_US.UTF-8

# Network information
network  --bootproto=dhcp --device=eno16777736 --ipv6=auto --activate
network  --hostname=localhost.localdomain
# Root password
rootpw --iscrypted $6$RMPTNRo5P7zulbAR$ueRnuz70DX2Z8Pb2oCgfXv4qXOjkdZlaMnC.CoLheFrUF4BEjRIX8rF.2QpPmj2F0a7iOBM3tUL3tyZNKsDp50
# System services
services --enabled="chronyd"
# System timezone
timezone Europe/Bucharest --isUtc
# System bootloader configuration
bootloader --location=mbr --boot-drive=sda
# Partition clearing information
clearpart --none --initlabel
# Disk partitioning information
part pv.20 --fstype="lvmpv" --ondisk=sda --size=19979
part /boot --fstype="xfs" --ondisk=sda --size=500
volgroup centos --pesize=4096 pv.20
logvol /  --fstype="xfs" --grow --maxsize=51200 --size=1024 --name=root --vgname=centos
logvol swap  --fstype="swap" --size=2048 --name=swap01 --vgname=centos

%packages
@compat-libraries
@core
wget
net-tools
chrony

%end
For more advanced Kickstart file options and syntax feel free to read RHEL 7 Kickstart Documentation.
3. Before attempting to use this file for installations procedures, it is important that you verify the file using ksvalidator command included on Pykickstart package, especially if manual customizations had been performed. Install Pykickstart package and verify your Kickstart file by issuing the following commands.
# yum install pykickstart
# ksvalidator /var/ftp/pub/anaconda-ks.cfg
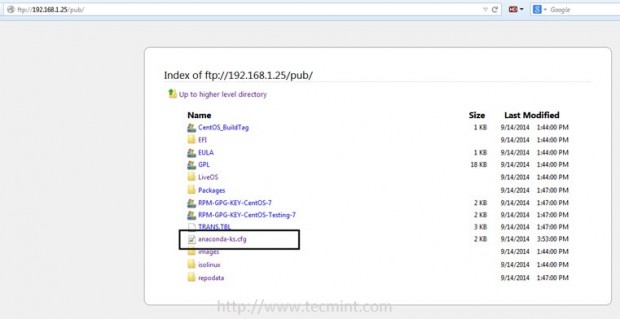
4. The last verification is to assure that Kickstart file is accessible from your specified network location – in this case FTP Local Mirror Installation Source defined by following URL Address.
ftp://192.168.1.25/pub/
Step 2: Add Kikstart Installation Label to PXE Server Configuration
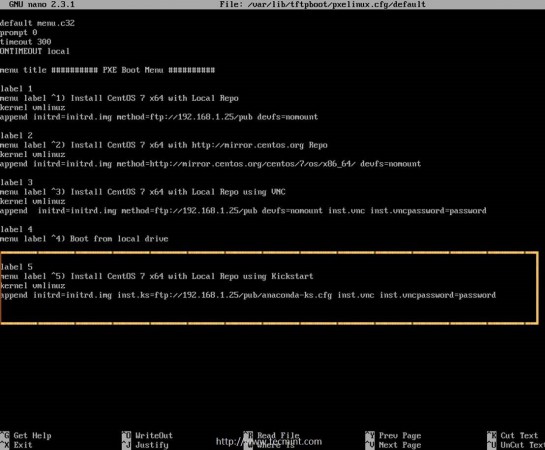
5. In order to access Automatic Installation of RHEL/CentOS 7 option from PXE Menu add the following label to PXE default file configuration.
# nano /var/lib/tftpboot/pxelinux.cfg/default
PXE Menu Label excerpt.
For RHEL 7
label 5
menu label ^5) Install RHEL 7 x64 with Local Repo using Kickstart
kernel vmlinuz
append initrd=initrd.img inst.ks=ftp://192.168.1.25/pub/anaconda-ks.cfg inst.vnc inst.vncpassword=password
For CentOS 7
label 5
menu label ^5) Install CentOS 7 x64 with Local Repo using Kickstart
kernel vmlinuz
append initrd=initrd.img inst.ks=ftp://192.168.1.25/pub/anaconda-ks.cfg inst.vnc inst.vncpassword=password
As you can see from this example the automatically installation can be supervised via VNC with password (replace VNC password accordingly) and the Kickstart file is located locally on PXE server and is specified by the initrd boot parameter inst.ks= FTP network location (replace protocol and network location accordingly if you are using other installation methods such as HTTP, HTTPS, NFS or remote Installation Sources and Kickstart files).
Step 3: Configure Clients to Automatically Install RHEL/CentOS 7 using Kickstart
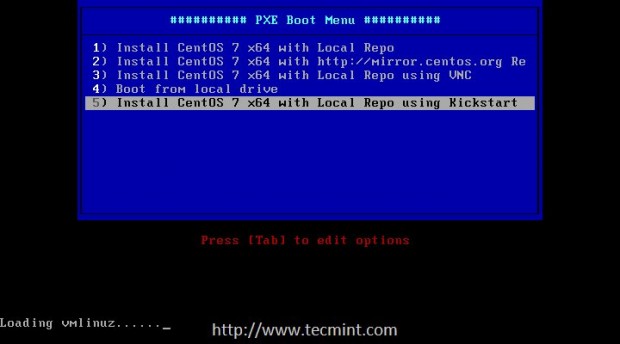
6. To automatically install RHEL/CentOS 7 and supervise the entire installation process, especially on headless servers, instruct your client machine from BIOS
to boot from network, wait a few seconds then press F8 and Enter keys, then select Kickstart option from PXE menu.
to boot from network, wait a few seconds then press F8 and Enter keys, then select Kickstart option from PXE menu.
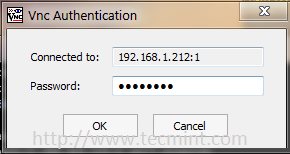
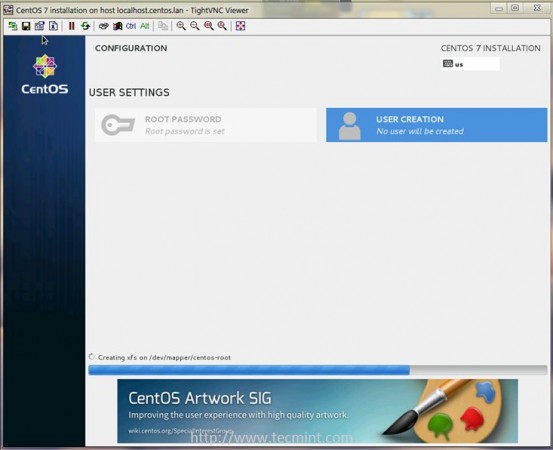
7. After the kernel and ramdisk loads and detects the Kickstart file, the installation process automatically starts without any intervention from user side needed. If you want to watch the installation process connect with a VNC client from a different computer using the address that the installer provides you and enjoy the view.
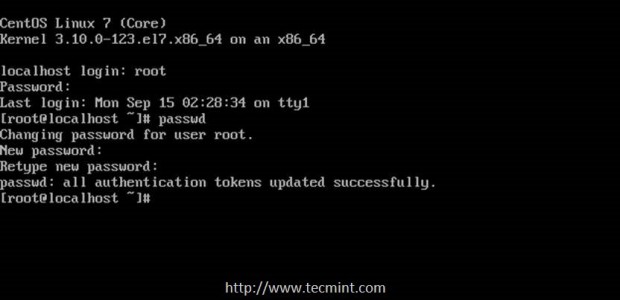
8. After the installation process finishes login to the newly installed system with root account and the password used on previous installation (the
one that you copied the Kickstart file) and change your client root password by running passwdcommand.
one that you copied the Kickstart file) and change your client root password by running passwdcommand.
That’s all! Automatic Kickstart installations offer a great deal of benefits for system administrators in environments that they have to perform system installations on multiple machines the same time, in a short period of time, without the need to manually interfere with the installation process.
If you have any questions or problems regarding this article and want help within 24 Hours? Ask Now
Support TecMint: Did you find this tutorial helpful?. Please help to keep it alive by donating. Every cent counts! - Donate Now
Matei Cezar
I'am a computer addicted guy, a fan of open source and linux based system software, have about 4 years experience with Linux distributions desktop, servers and bash scripting.
Your name can also be listed here. Got a tip? Submit it here to become an TecMint author.
Receive Your Free Complimentary eBook NOW! - Securing & Optimizing Linux: The Hacking Solution (v.3.0)
- NEXT STORYManaging Users & Groups, File Permissions & Attributes and Enabling sudo Access on Accounts – Part 8
- PREVIOUS STORYLFCS: Managing System Startup Process and Services (SysVinit, Systemd and Upstart) – Part 7
YOU MAY ALSO LIKE...
10 RESPONSES
LEAVE A REPLY
DOWNLOAD FREE LINUX EBOOKS
- Complete Linux Command Line Cheat Sheet
- The GNU/Linux Advanced Administration Guide
- Securing & Optimizing Linux Servers
- Linux Patch Management: Keeping Linux Up To Date
- Introduction to Linux – A Hands on Guide
- Understanding the Linux® Virtual Memory Manager
- Linux Bible – Packed with Updates and Exercises
- A Newbie’s Getting Started Guide to Linux
- Linux from Scratch – Create Your Own Linux OS
- Linux Shell Scripting Cookbook, Second Edition
- Securing & Optimizing Linux: The Hacking Solution
- User Mode Linux – Understanding and Administration





individual kick-start server for different os
Aug 14 19:34:12 tabasco kernel: iptables denied: IN=em3 OUT= MAC=ff:ff:ff:ff:ff:ff:a4:ba:db:e9:4d:55:08:00 SRC=0.0.0.0 DST=255.255.255.255 LEN=576 TOS=0x00 PREC=0x00 TTL=20 ID=3 PROTO=UDP SPT=68 DPT=67 LEN=556
-A OUTPUT -s 0.0.0.0 -p udp –sport 67 -d 255.255.255.255 –dport 68 -j ACCEPT
How to Automated Installations RHEL with graphical desktop mode through PXE Kickstart.
The guide already showing the GUI installation through PXE Kickstart….